We love pictures of food. We indulge in artistically sharing what we are about to devour. I have a soft spot for these types of pictures. Photographs taken with a cell phone can be very creative and yummy. That’s why I’ve checked out some experts, and I’d like to share some tips on how to take culinary pictures using your cell phone.
Your eyes are bigger than your stomach. Take this with a pinch of salt: visual perception reigns supreme. I don’t know whether it happens to you, but a good picture of a dish makes me eager to try it. Thanks to social media and smartphones, it’s easy to take pictures of food and share them. Now taking good pictures is something that needs to be nurtured. Creativity is the subjective part in all this and this is where my focus will be today.
I open up my notebook where I’ve penned in the tips I was given to be able to stand out on the digital scene. Sharp contrasts. The lighting, the setting, the food condition, filters … All geared to becoming a foodie in Instagram. Sounds good, doesn’t it?
LIGHT: TRY KEEPING IT NATURAL
As in many walks of life, natural is better. If you use a flash you’ll probably get unwanted reflections and textures, as well as possible color changes. So, if you lack professional lighting tools you should look for some place that isn’t dark. When there isn’t much light around, a cell phone is not the most reliable of devices.
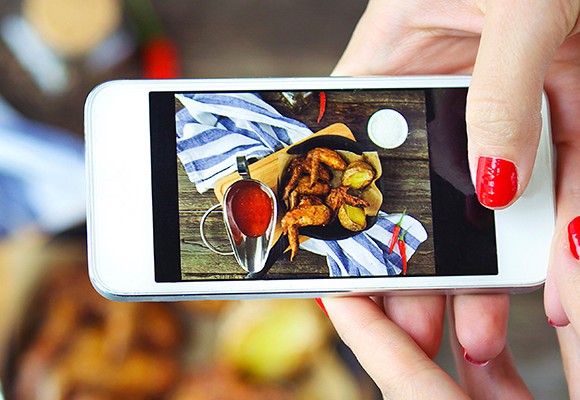
In this respect, colors too are important. Seek out contrasts, not only in the foods but in the dishes and other items, for instance the table, the tablecloth or the napkins. But keep it simple and do not deviate from a realistic setting.
Many items can take the focus away from the food and you are not about to let that happen. That’s why you should also have a command over the setting. You won’t get away with a wrinkled table cloth or food smears on the edge of the dish. We want to convey culinary excellence, not sloppiness. Take care of the premium details. Now of course beauty can show up in a spontaneous accident, such as seeds or a loose branch setting on the table.
WHAT IS THE BEST ANGLE?
There is no single answer to this. Picture this scene: we’ve got the setting, the right lighting and we’ve chosen the colors. What next? It’s simple. Try out different angles. Take a few pictures from above and move things around to make it symmetrical. Then do the same thing with frontal views. What looks better? Well, don’t try taking a bird’s eye view of a nice, juicy hamburger because it just won’t work.